Paste paper is very simple to make and requires flour and water, a squirt bottle to wet the paper and some acrylic paints to add colour. Some things I used to create the designs with were a fork, a cheese grater, and the serrated edge of a knife. I also added pieces of decorative papers to enhance the paste paper.
These are three of the colours I used, copper, turquoise and the top one is an iridescent gold.
These are the other two colours, red and black. The black acrylic paint I used is micaceous iron oxide which has a sandy texture to it and a little sparkle.
This piece was very experimental. I used a smoothe 100 pound, acid free bristol paper. I wasn't sure how it would respond to being wet and then the added moisture of the paste. I am happy to report it responded very well to the treatment. I used the same large paint brush to create the border and the serrated edge of a knife for the small lines on the inner part of the design.

I used the gold iridescent paint on this denim paper. When wet, the paper was very soft and pleasing to the touch. You can just see a hint of the gold in this picture. I added a piece of decorative paper with gold in it.
These are three smaller pieces of paste paper that I will use for my Endearment books. I used a fork and a paintbrush to create the different designs in these papers.
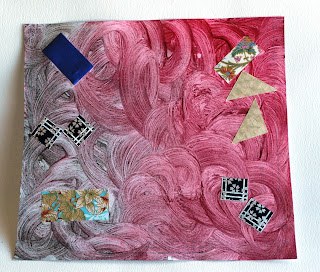
These two pieces of red paste paper were done on a cotton rag paper. I used a fork and my hands to create the designs and added cut outs from a greeting card for enhancement.
This is my simulated snakeskin paper. I used a wood rasp, meant to shape wood. I usually use it to grate cheese. Yesterday I found a new purpose for it. The design worked well with the paste paper. I blended the black and red together. This will make a great book cover with leather and mother of pearl enhancements.
This is another piece of brown flax paper. I used the copper paste on this one. The flax particles in and on the paper create the design in the paste. When held at certain angles in the light, this paper has a beautiful copper shimmer. I added some decorative papers to enhance the look.
I had a great deal of fun expressing my creativity through the drawings and making of paste paper this weekend. I am really looking forward to teaching this in the new year.


No comments:
Post a Comment